From Ubuntu 17.10, Canonical has been introduced a new tool named Netplan for network setting management. Here the steps to configure static IP on an Ubuntu system from the command line.
What is the Netplan?
Netplan is a utility for easily configuring networking on a linux system. You simply create a YAML description of the required network interfaces and what each should be configured to do. From this description Netplan will generate all the necessary configuration for your chosen renderer tool.
Configure a Static IP Address with Netplan
The Netplan configuration files are located in the directory /etc/netplan/. The default configuration file on Ubuntu Server 18.04: /etc/netplan/50-cloud-init.yaml
# This file is generated from information provided by
# the datasource.  Changes to it will not persist across an instance.
# To disable cloud-init's network configuration capabilities, write a file
# /etc/cloud/cloud.cfg.d/99-disable-network-config.cfg with the following:
# network: {config: disabled}
network:
    ethernets:
        enp0s3:
            dhcp4: no
            dhcp6: no
            addresses: [192.168.2.10/24]
            gateway4: 192.168.2.1
            nameservers:
               addresses: [192.168.2.1]
    version: 2
Run below command to apply the change:
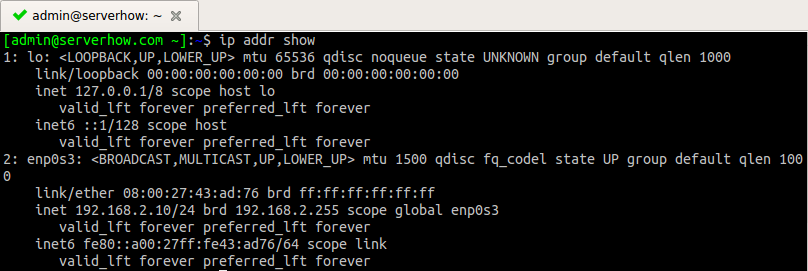
[admin@serverhow.com ~] sudo netplan applyVerify your static ip, run ip command:
[admin@serverhow.com ~] ip addr show
Configure a DHCP address with Netplan
Edit the configuration file /etc/netplan/50-cloud-init.yaml
# This file is generated from information provided by
# the datasource.  Changes to it will not persist across an instance.
# To disable cloud-init's network configuration capabilities, write a file
# /etc/cloud/cloud.cfg.d/99-disable-network-config.cfg with the following:
# network: {config: disabled}
network:
    ethernets:
        enp0s3:
            dhcp4: yes
            dhcp6: yes
    version: 2
To apply the change, run
[admin@serverhow.com ~] sudo netplan apply